

What is WordPress?
WordPress.org is a free open source repository of Web site designs. You can learn more about WordPress.org here: https://wordpress.org/about/ There is also a similarly named Web site, Wordpress.com, which is unrelated. The .com version is a for-profit company for bloggers to set up their sites.(Remember how I mentioned in an earlier story about the confusion when you share the same domain, but different domain suffixes with someone else?! Here's a prime example.)
Many themes on WordPress.org are free, but some have upgrades that you can pay for. You'll be able to examine the various themes through WordPress.org. Keep in mind that you will have some edit capability when you incorporate a theme into your Web site. So if you like how the home page shows up with 3 photos that scroll on a background, but you don't care for the color scheme, you can probably edit that color scheme for your needs.
Theme Responsiveness
A key characteristic that your theme must have is responsiveness. This means that there is a built-in ability in the theme to adjust for the display type used to show your Web pages. On a computer screen, there may be a bar across the top that lists the menu of pages you can click to on your Web site. This same directory may show up as a "hamburger menu" (three short lines stacked over each other looking like a hamburger on a bun) on a mobile phone screen, where there isn't enough space to show all across the screen. A user would click on the hamburger menu symbol to expand and see the menu choices stacked over each other rather than side-by-side as on the computer screen. These differences between display types are part of a responsive design.
Internet search tools rank a site's response very high especially when most of today's Internet search users are on a mobile phone. If your site isn't responsive, it's devalued compared to other sites by Internet Search Engines. With this in mind, be sure that the theme you choose is declared to be responsive.
Setting up your Web site to use WordPress.org
The next step is actually creating a Web site and assigning it to your new domain. SiteGround offers a step-by-step process to create your new Web site. Just click on the SiteGround link to create a "new web site". You'll be asked about the domain to use where you can specify your newly purchased domain name. You'll be asked if you're starting a new Web site or migrating an existing one. In our case, you'll be building a new site. Then you'll be offered an application which to base the building of your Web site. I'll be guiding you through the "WordPress" option. You will also see "WordPress with WooCommerce", "Weebly Sitebuilder" and "Other", where you can specify something else.
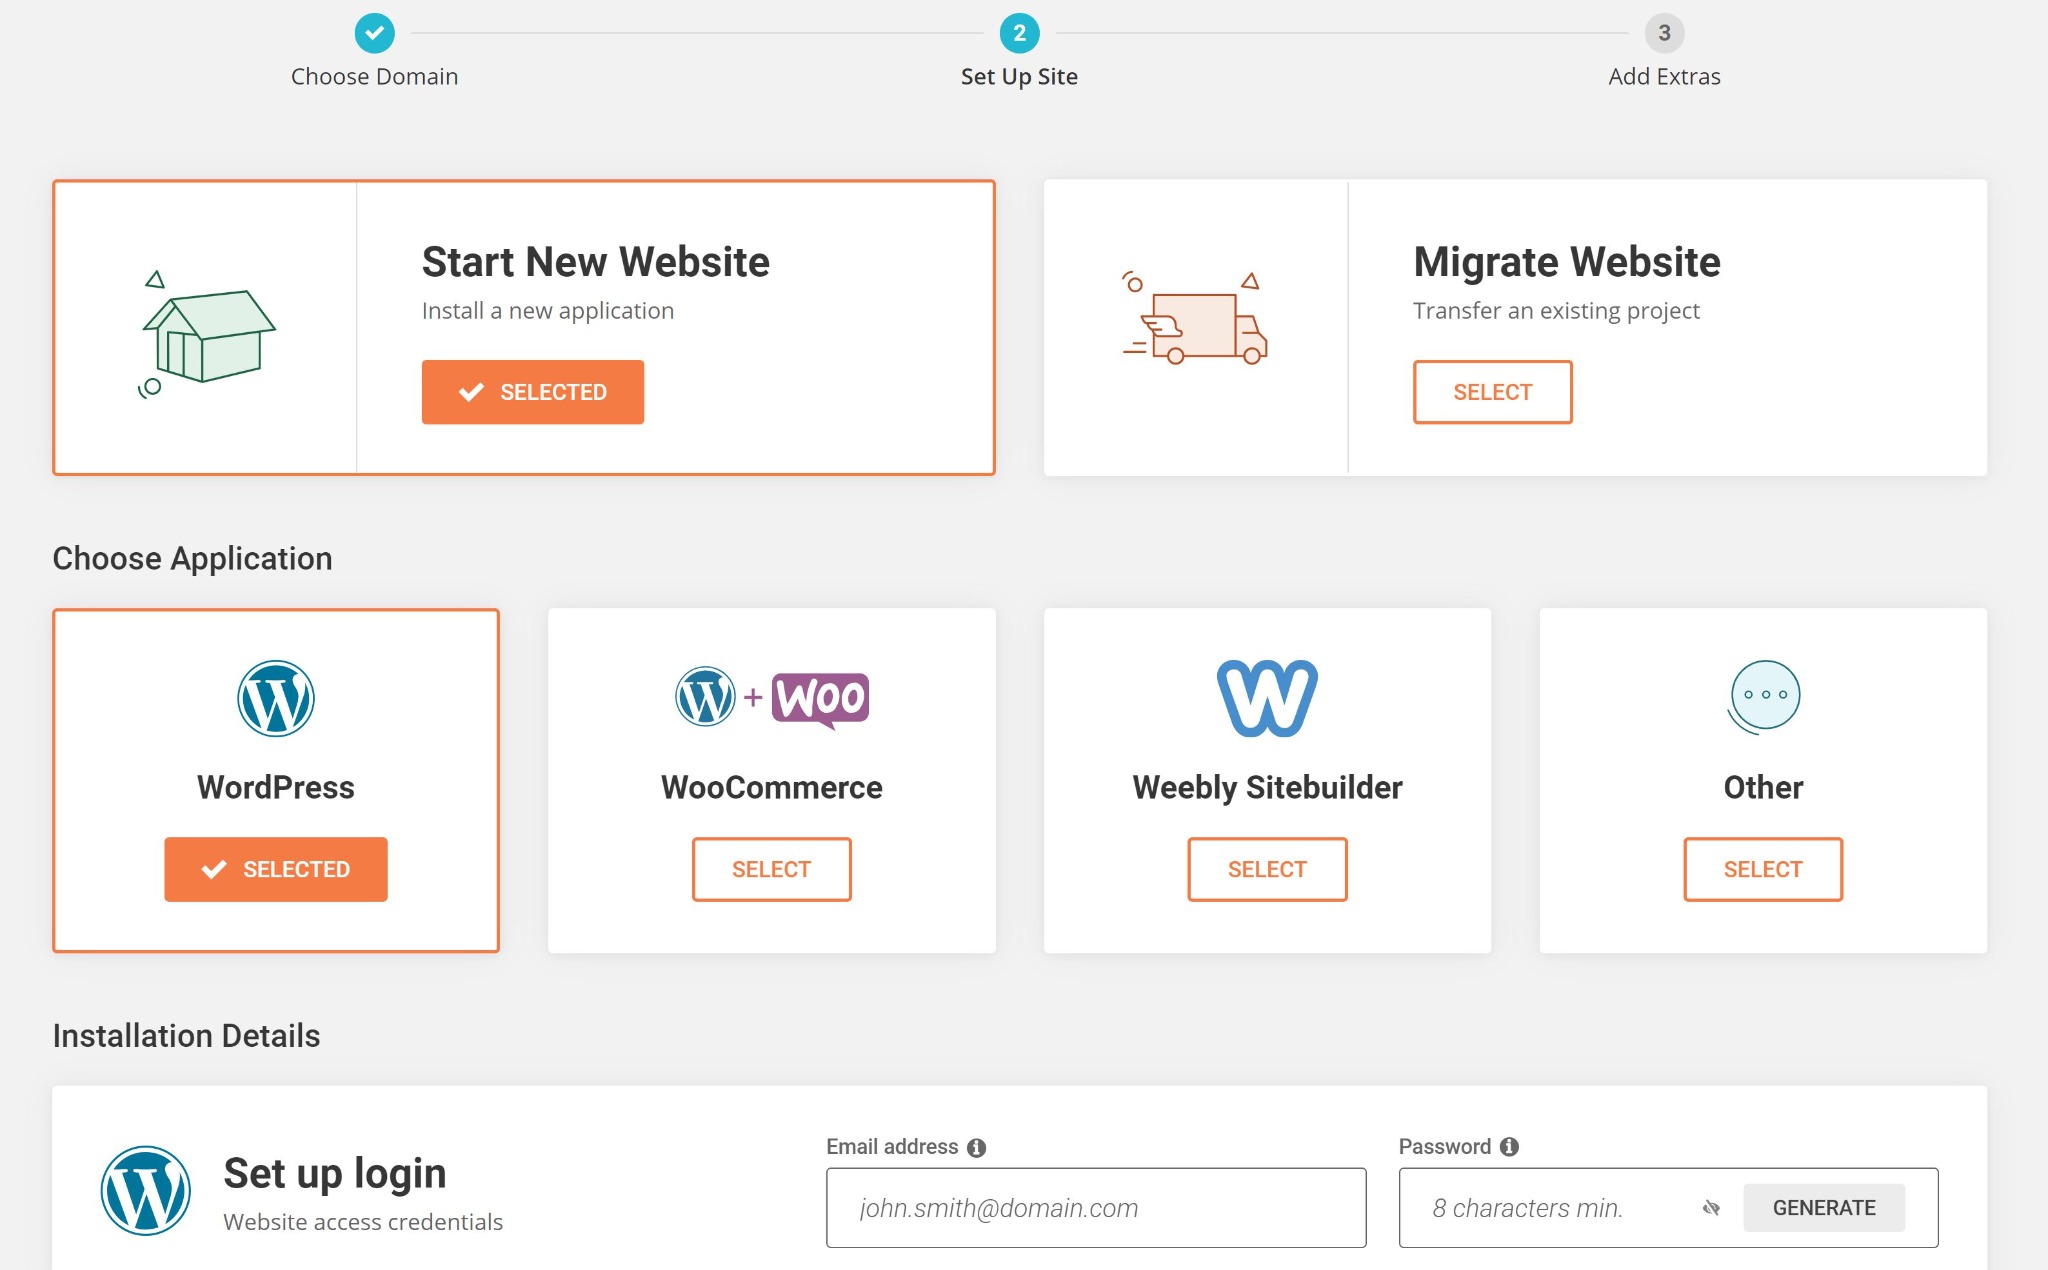
After choosing "WordPress", the installation details section will appear asking you to enter your new Web site credentials that you'll use to edit your Web site in WordPress. Your specified email will become the admin username associated with WordPress for your Web site. This is different than your userid/password for your SiteGround account. I choose the generate option to create the password. You really want to be sure you have a password that can't be guessed else someone could get in and hack your site. You can copy the generated password to save in a safe location.
As you continue through the process of creating your WordPress Web site, SiteGround may try to sell you something. I don't bother with any new purchases. Just click "Finish". In the background, SiteGround will connect with WordPress to create the basic files and database required for your Web site. These files and database will be stored on the SiteGround computer servers defined for your use. Once complete, you'll get a confirmation email. Your SiteGround page will also display options to Go to your site, log in as admin to WordPress or Manage your Site.
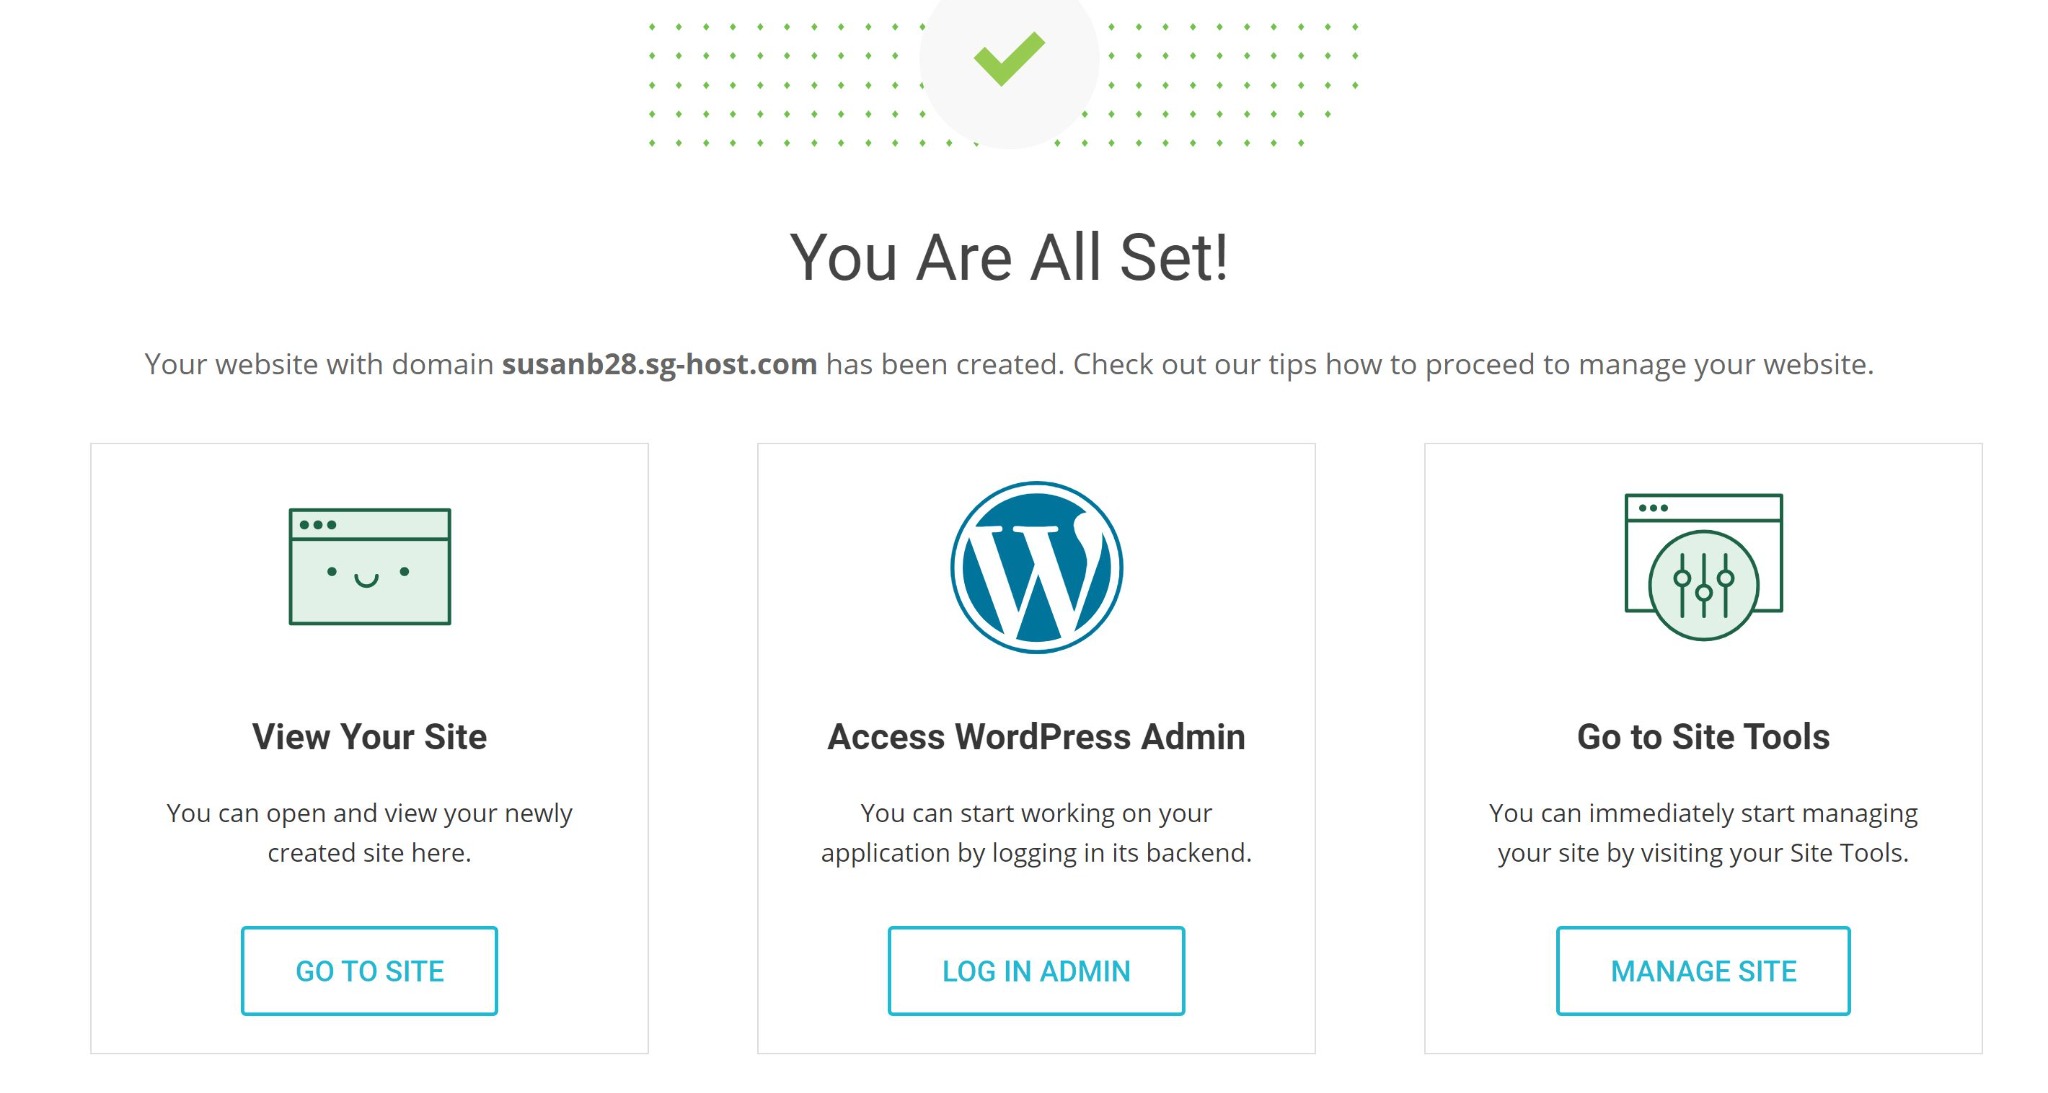
You can Go To Site, but you'll see that you have nothing there yet. Eventually you'll want to Manage Your Site (this is where you can set up your related email accounts, etc.) But for now, click on Access Wordpress Admin. You'll see the sign-in screen for your Wordpress Admin userid and password you created earlier.
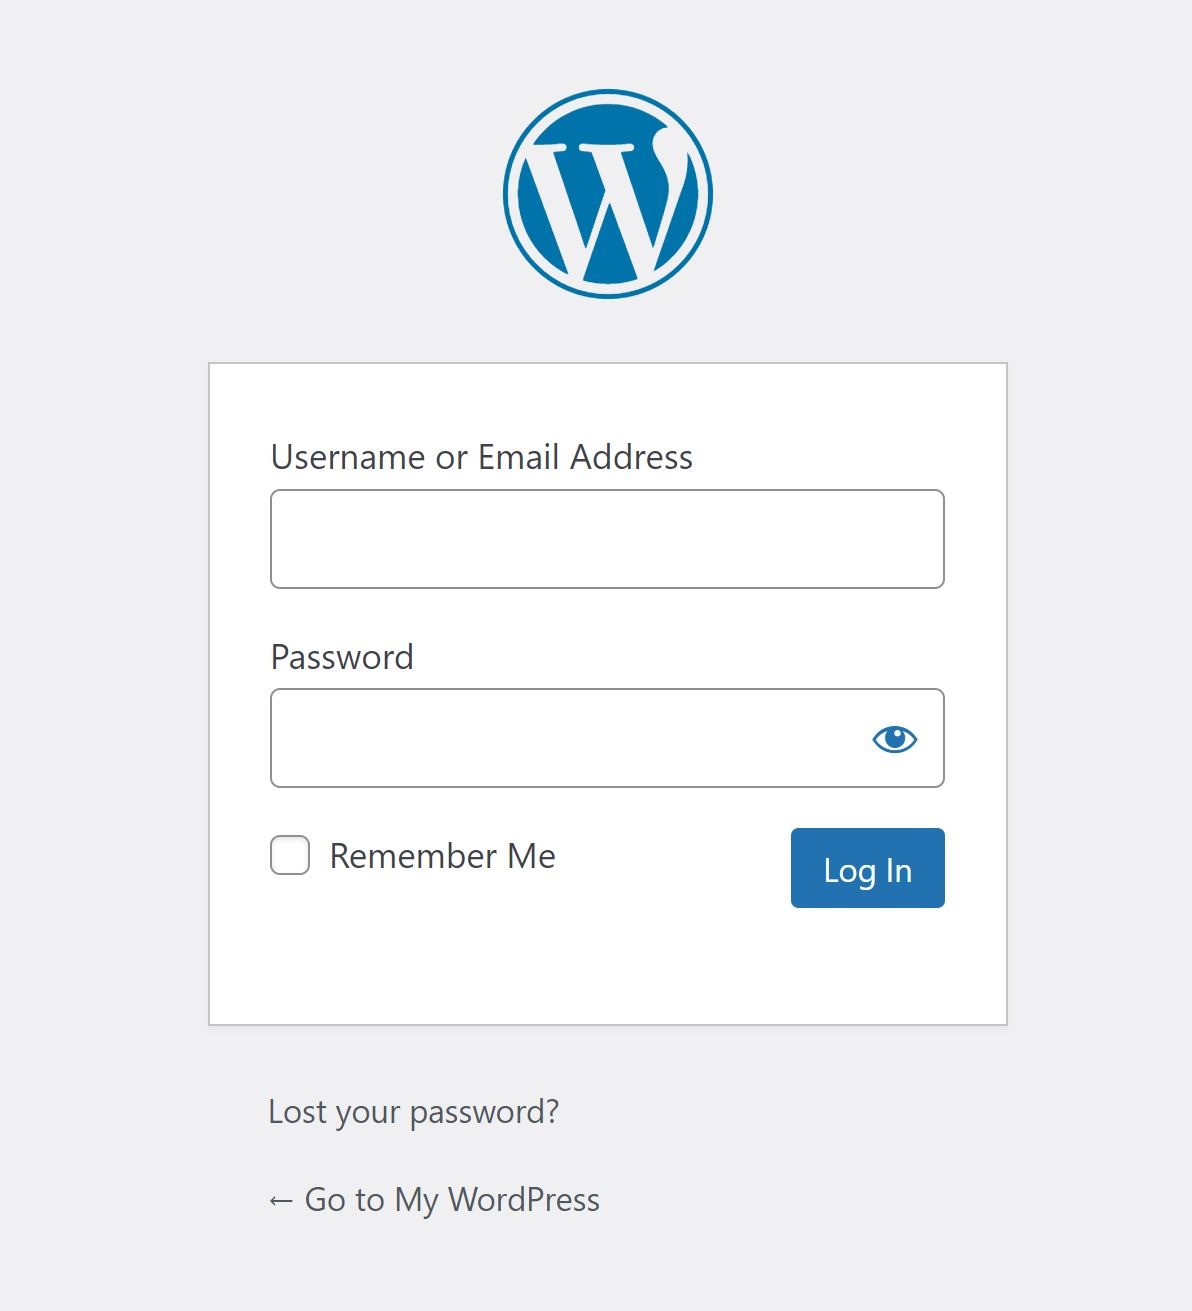
Note: Although you can get into the WordPress editor for your new Web site through this SiteGround interface, you don't have to. You can now just open up the URL for you new Web site followed by "/wp-admin" and you'll get to the same WordPress login screen. For now, you're being directed through the initial set up, so continue through the SiteGround interface so that it will guide you.
Siteground will then start guiding you through the process of picking and installing your WordPress theme. You can click on the plus sign to pick a theme and get a feel for it. Then choose "Select" when you have one you want to use as a base. Note: If you don't like any of these, you can still explore other themes and change. Just choose one now to get started.
Choosing Standard Plug-ins
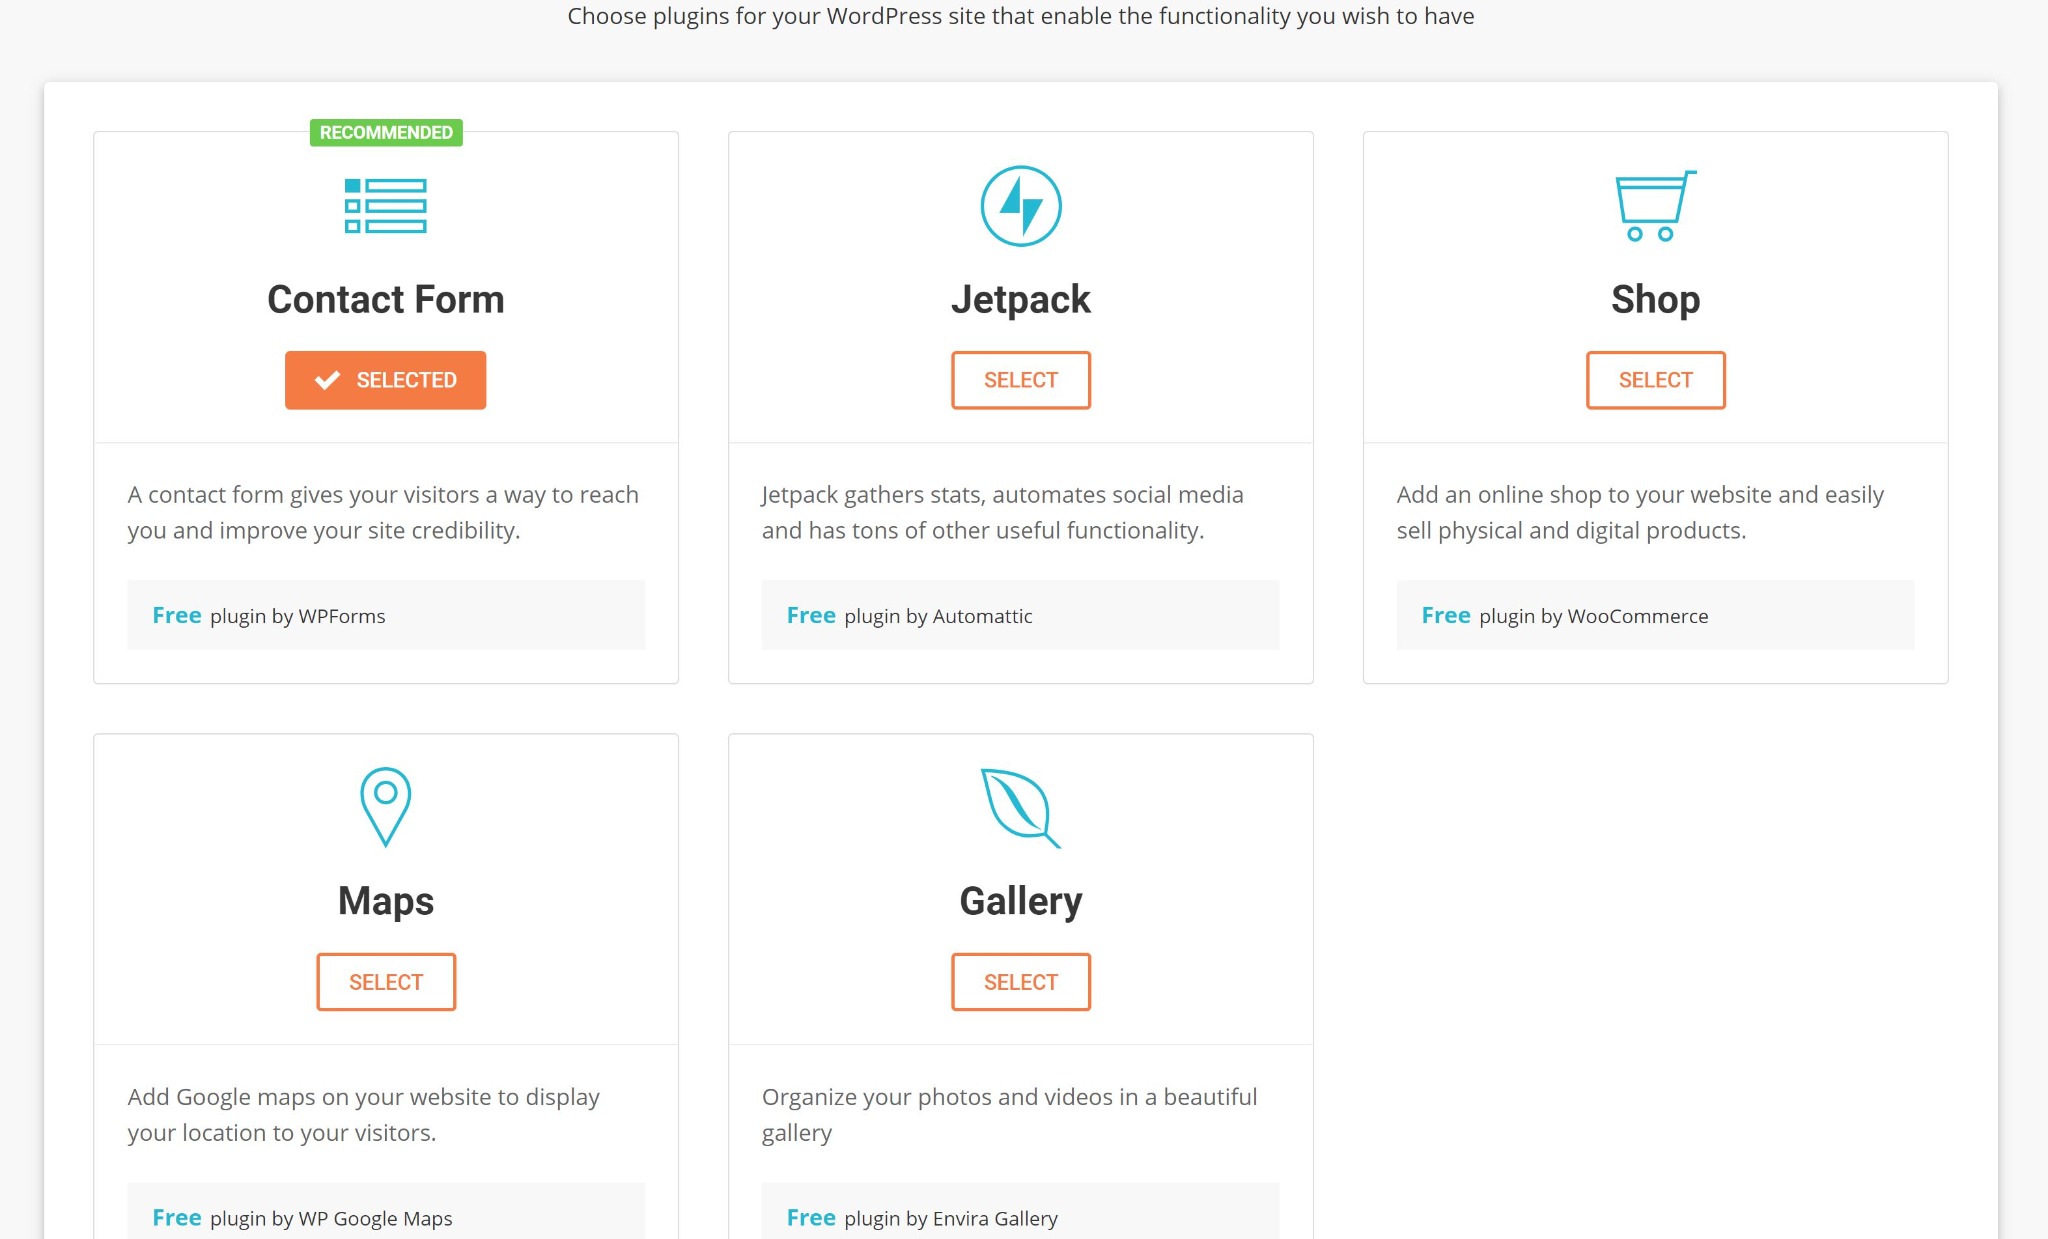
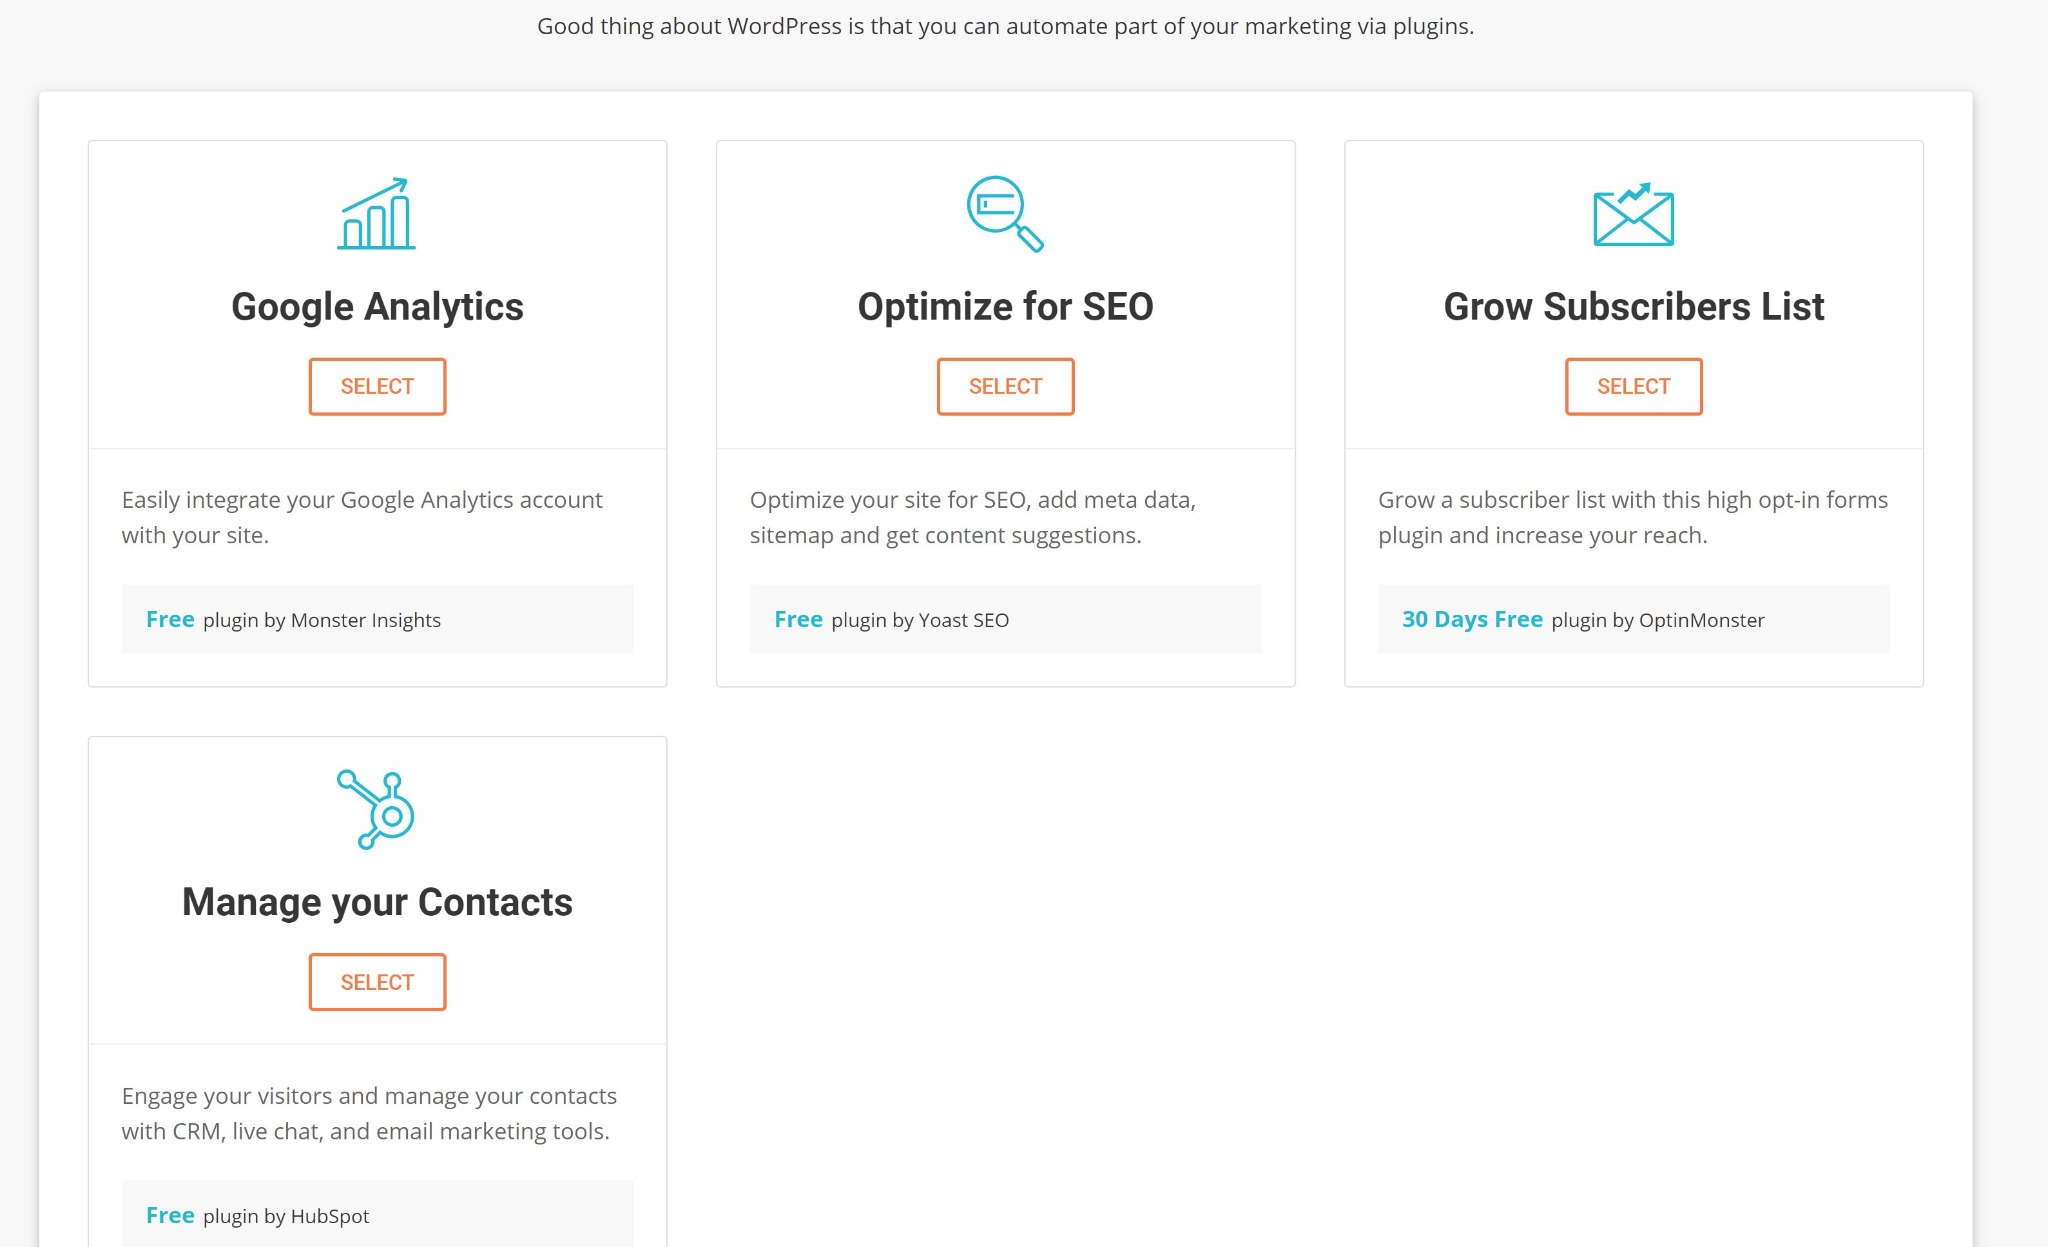
The next page will offer you some plug-ins that you might find helpful on your Web site. Again, you can always choose these items later or even other plug-ins that provide similar services but in a format you prefer. At this point, don't pick the Contact Form or other plug-ins on this first page because I feel that there are other better versions of these same plug-ins that you can install afterwards. For example, this WPForms plug-in for creating a form seems like a good option. However, when I examined the installed version of this plug-in on my test Web site, I noticed it has limited capabilities. To get all the features that would be useful, you'd have to pay for it. I prefer the plug-in called Contact Form 7. More about that later in this document.
The second page of offered plug-in choices are geared to managing your Web site and contact. I prefer the Google Analytics plug-in written by Google over the one offered here. However, Yoast does offer great SEO options even in their free version, so go ahead and select the Optimize for SEO. To really make use of any plug-ins you install, you will have to spend some time configuring them.
After submission and a little churning, you'll finally get the message that your site has been created.
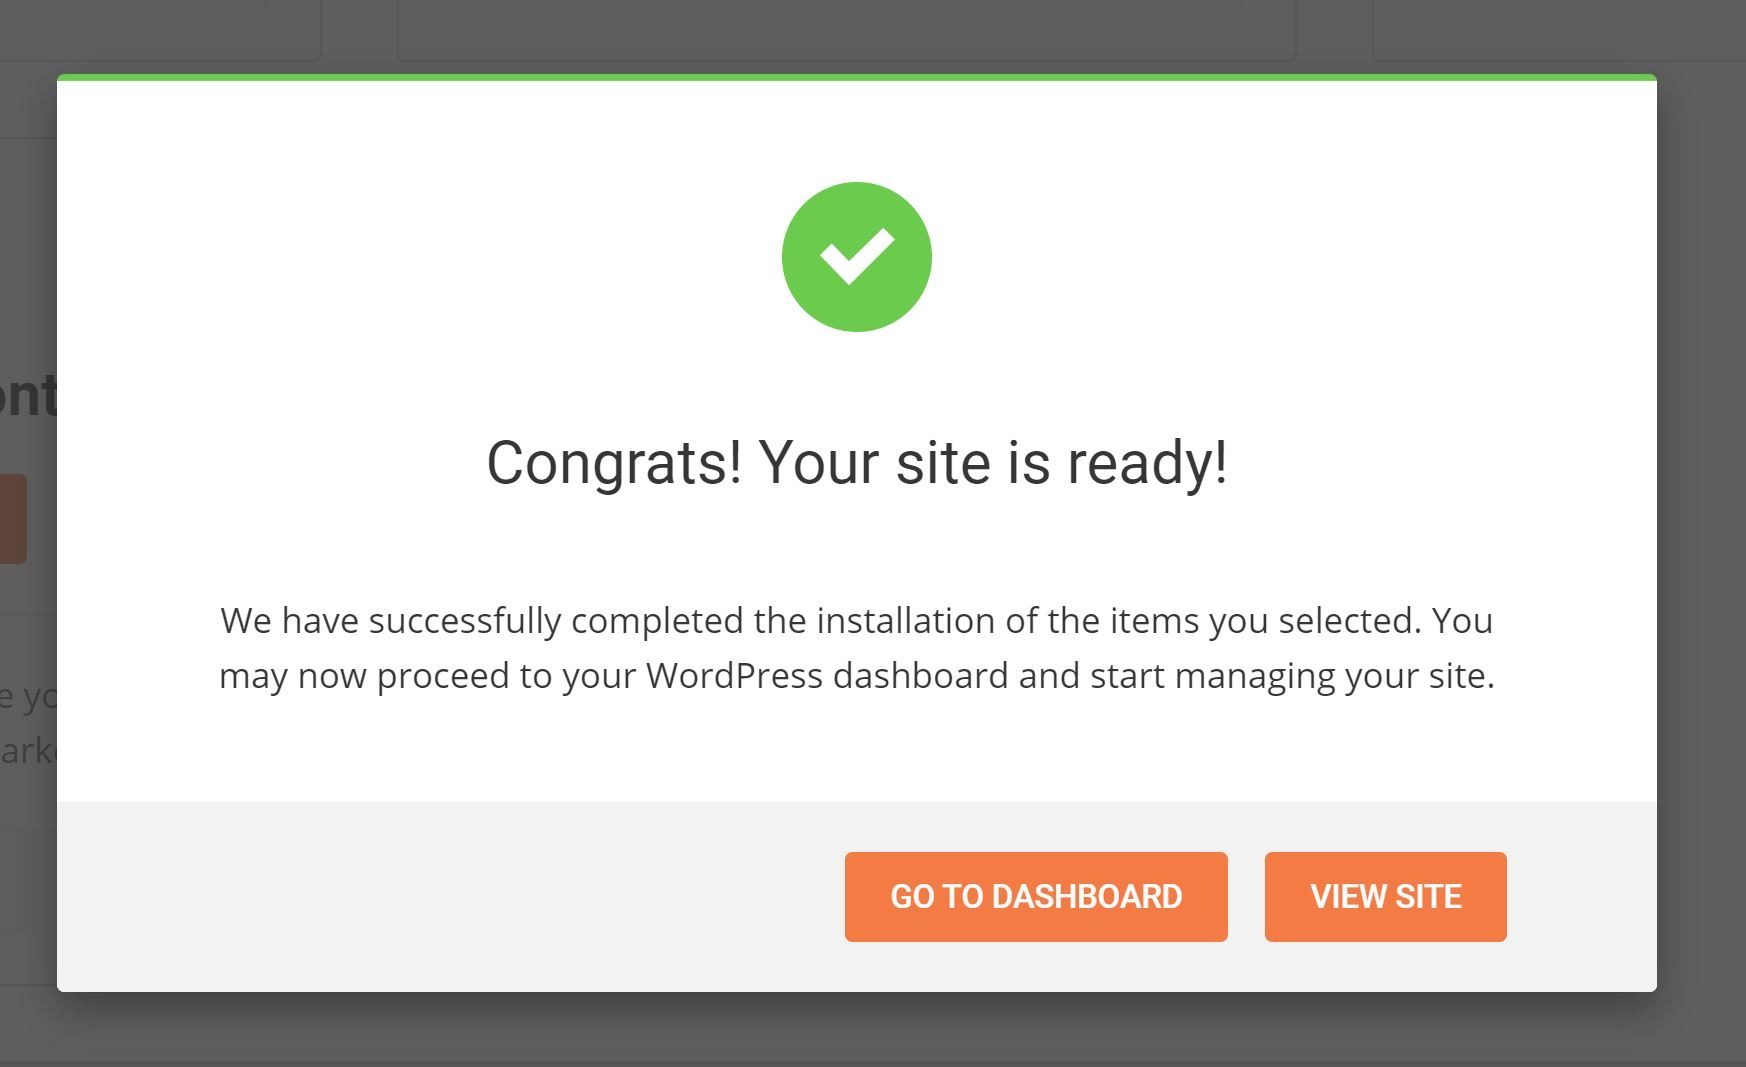
You can click to "View Site". You'll notice that the URL displayed on your browser is your domain name. You'll also see a bar across the top that allows you to access your WordPress controls since you are still working on the browser where you've signed in with your WordPress Admin userid and password. The Web site shown will have the default pictures and words you saw when you chose the theme.

My WordPress Dashboard
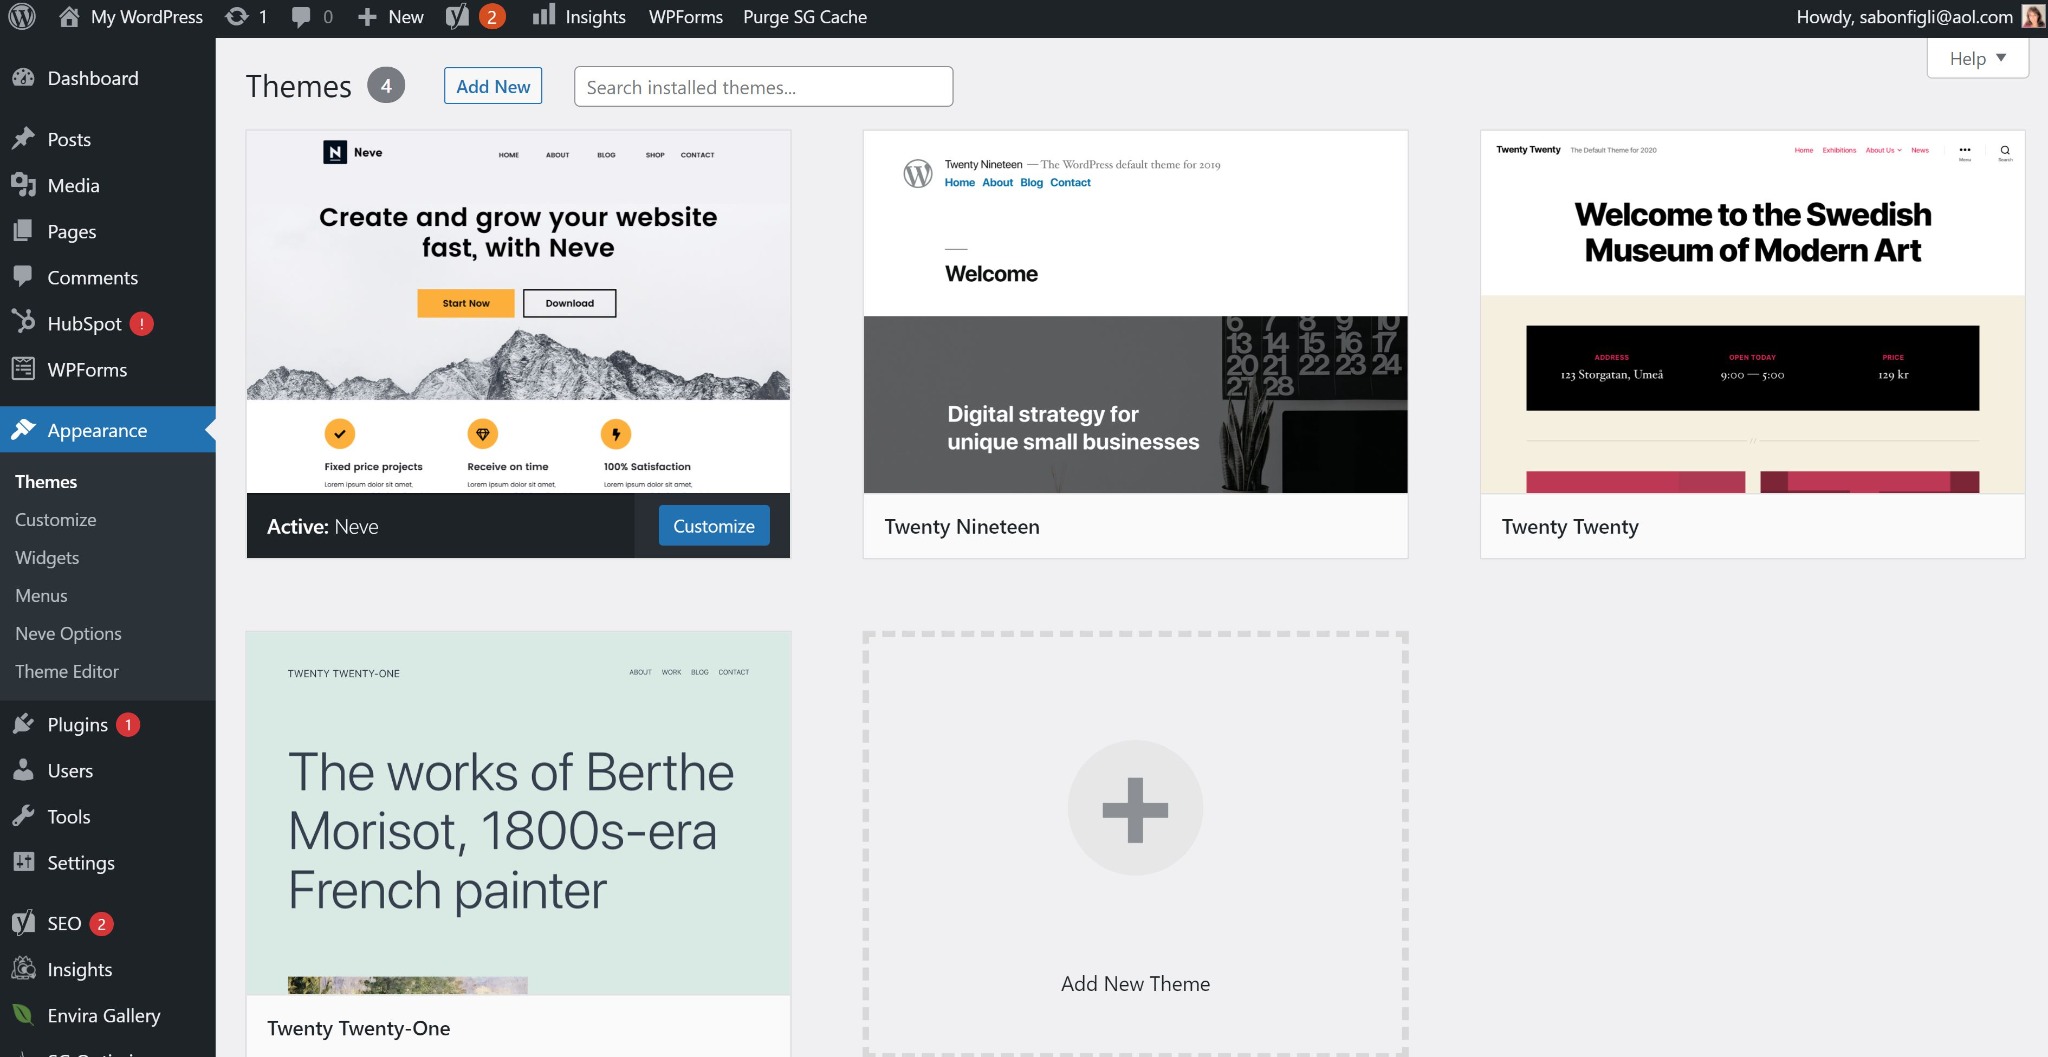
You can start your edits by choosing "My WordPress" at the top of the page. You'll notice that "Themes" is one of the drop-down menu choices. You can click here to go pick a theme that really strikes you. You will be taken to the "Appearance" menu of your site's WordPress Dashboard where it will display the Themes installed on your SiteGround storage space. I would suggest you only save and store the theme you will be using for your Website to avoid wasted space usage. You don't need to clean up now, but think about doing it after you've locked in on a new theme for your Web site.
Look for Other Theme Options
To find other Themes, click the "Add New" button.
Click the "Feature Filter" button to pick the criteria that's important to you. Scroll through the themes. Click on Preview to get a feel for the theme. If you decide you like one, choose to install it. You'll then need to activate it to see how it looks on your domain. Note: I didn't notice an option to choose "responsive" as a feature. Perhaps the default themes are responsive as it's well-known that responsiveness is important. However, before you commit to a theme that seems good for your needs, research that theme to ensure it is responsive.
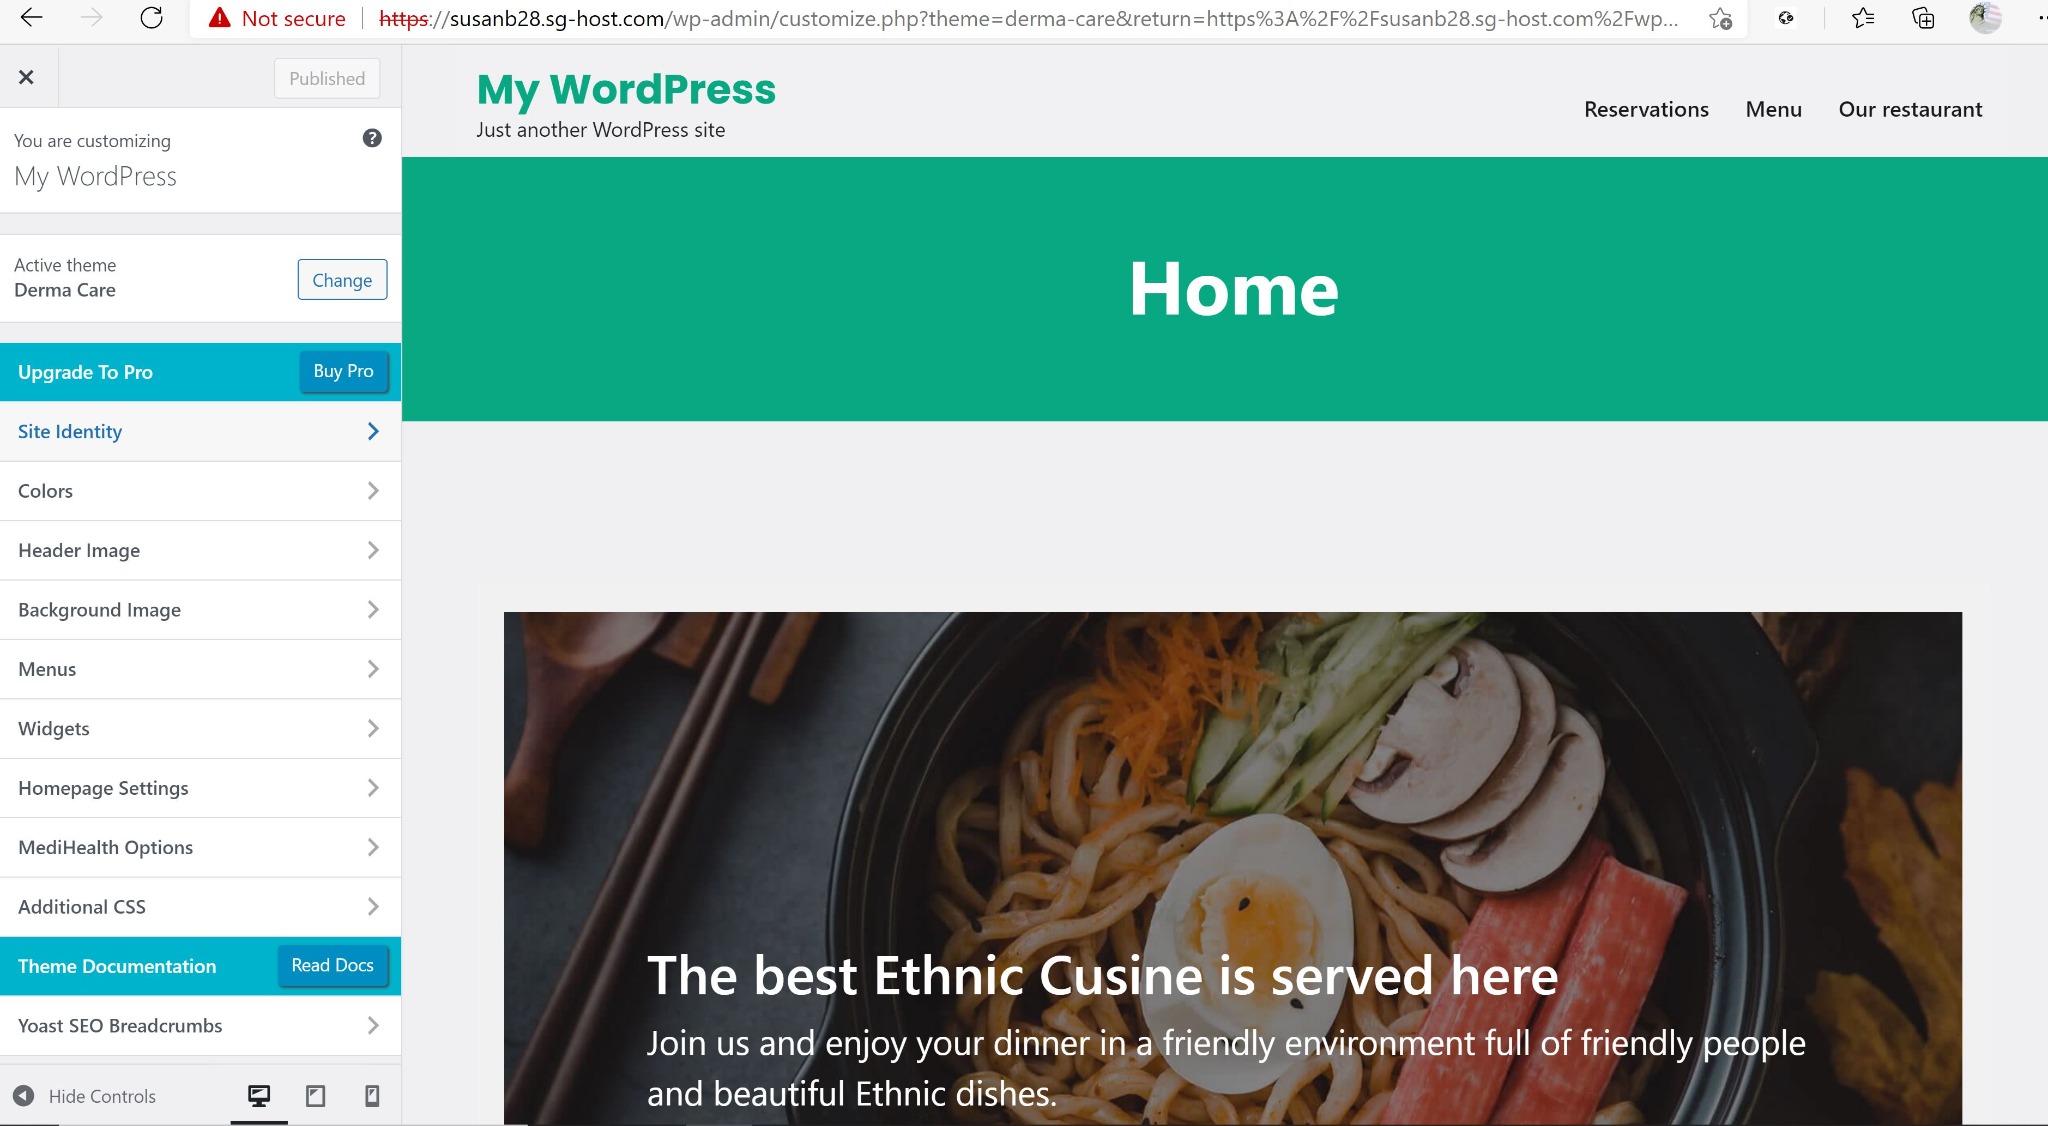
Once you found the theme you want to use, click "Customize". A page will be displayed (The URL will start out as...YourDomain/wp-admin/...) that will allow you to choose updateable values on the left and the results of those changes will be shown on the right. At the very bottom left, you can choose how that change will be seen on either a computer screen, a tablet or a mobile phone.
Editing your Web Site Now that you have a Theme
I'm not going to get into the details about editing. At this point, you should explore and see what happens. You may want to do some research on the theme you've chosen. There may be recommendations about the size of the photos you use on the site. Example, the documentation may stress that there is an ideal dimension to use for header photos or background photos. Some of these dimensions will be stated on the Customization page for the item you're updating.
You can use online applications like Canva.com to edit your photos to the dimensions suggested.
Also remember that your Web site is only effective if it's legible. Dark writing on white or lighter backgrounds are easily readable. Those with vision problems will have more difficulty reading writing where there is little contrast with the background.
Save Your Changes Before Exiting Customizer
On the Customize page, make sure to select the Publish button to save your changes.
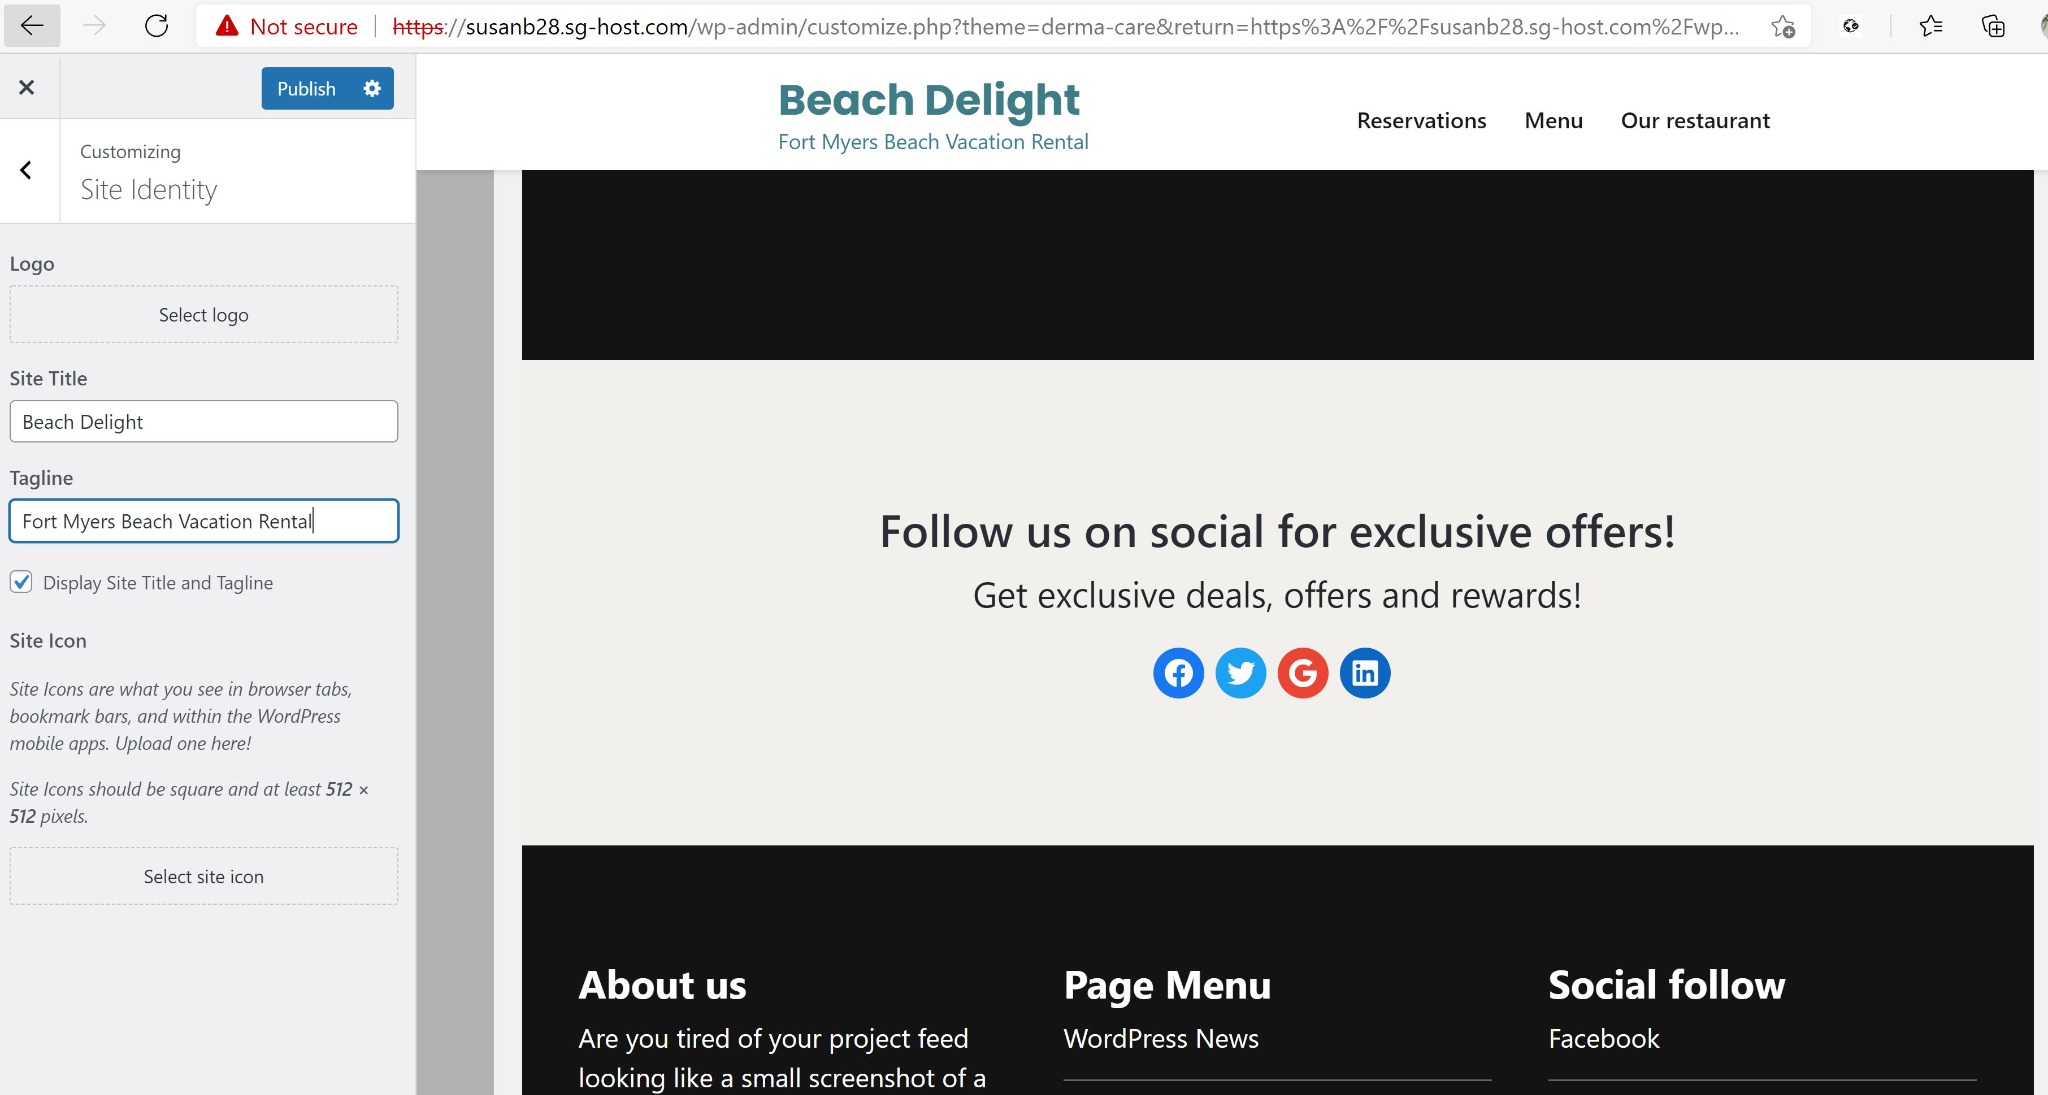
You can press the X to close the Customizer and get back to your site's WordPress Dashboard.
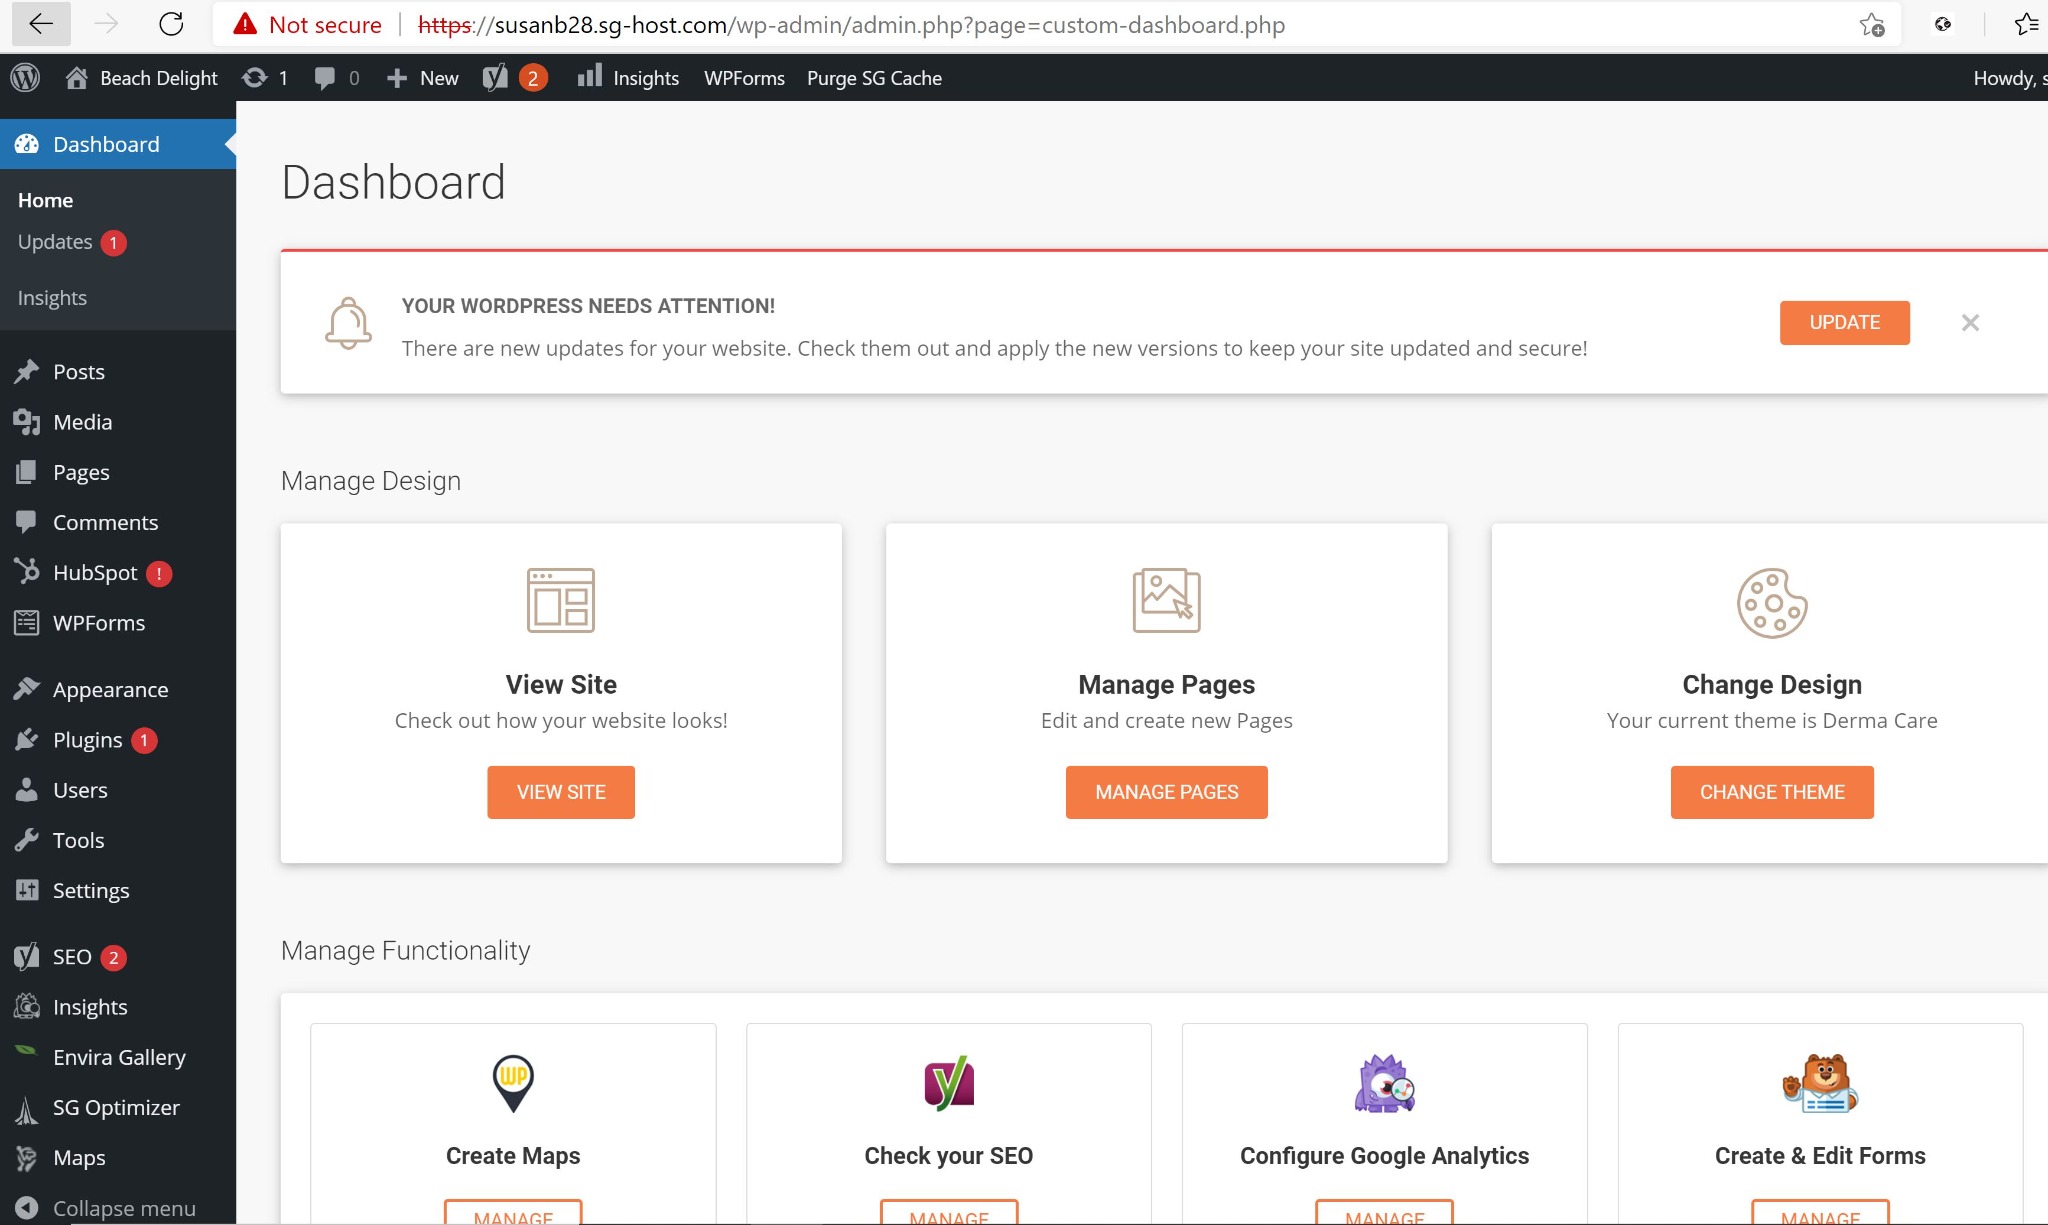
What Can You Do From WordPress Dashboard?
From the dashboard, you can edit existing pages on your Web site and add more. You can search for and add more plug-ins. You can edit your existing plug-ins. For example, for your Contact Form, you'll want to define the fields you want to collect (person's name, email, phone, message, etc).
If you open a Page to edit, you should receive some help pop-ups that explain the WordPress Block Editor. Everything you add to your page is added in a block. The block has characteristics you can set. For example, if it's a Heading Block, you can set the Heading type, the color of the heading words and background, etc.
You'll be adding HTML (i.e. The Web page coding) blocks to hold the Houfy embed objects like your property calendar and property pricing chart.
Explore Your WordPress Installation
WordPress Posts
Keep in mind that WordPress was inspired for bloggers. Bloggers write posts (see the Posts tab). Users may write comments that you can choose to publish or not. Of course, you may decide not to use/publish any posts initially, but look at using these posts for future growth of your Web site (i.e. Expanding your SEO - more keywords allowing your site to show up on more search result screen.) Your posts may be related to specific things to see and do in your area, your favorite restaurants, the change of seasons at your property, etc. Posts are a way to add new life to your site and perhaps bring in people that might never have found you.
As an example, I created a post for the only local Chinese restaurant near our rental property. Using Google Analytics, I can see that blog post is a landing page for some Internet search every single day! I know that this restaurant does not have its own Web site so the search engines are finding my post as the next best thing for "Chinese restaurants near me".
Now I don't know if any of these people will ever rent my property, but I do know that my property and Web site are getting more visibility than without.
Certainly, if you don't want to write posts, you don't have to. It's just another opportunity you can choose to use.
Contact Forms
The default contact form plug-in that SiteGround offered isn't the Contact Form that I've used on my own Web sites. As I mentioned earlier in this document, the default plug-in doesn't have all the features that you'll probably want without paying something for the additional needs.
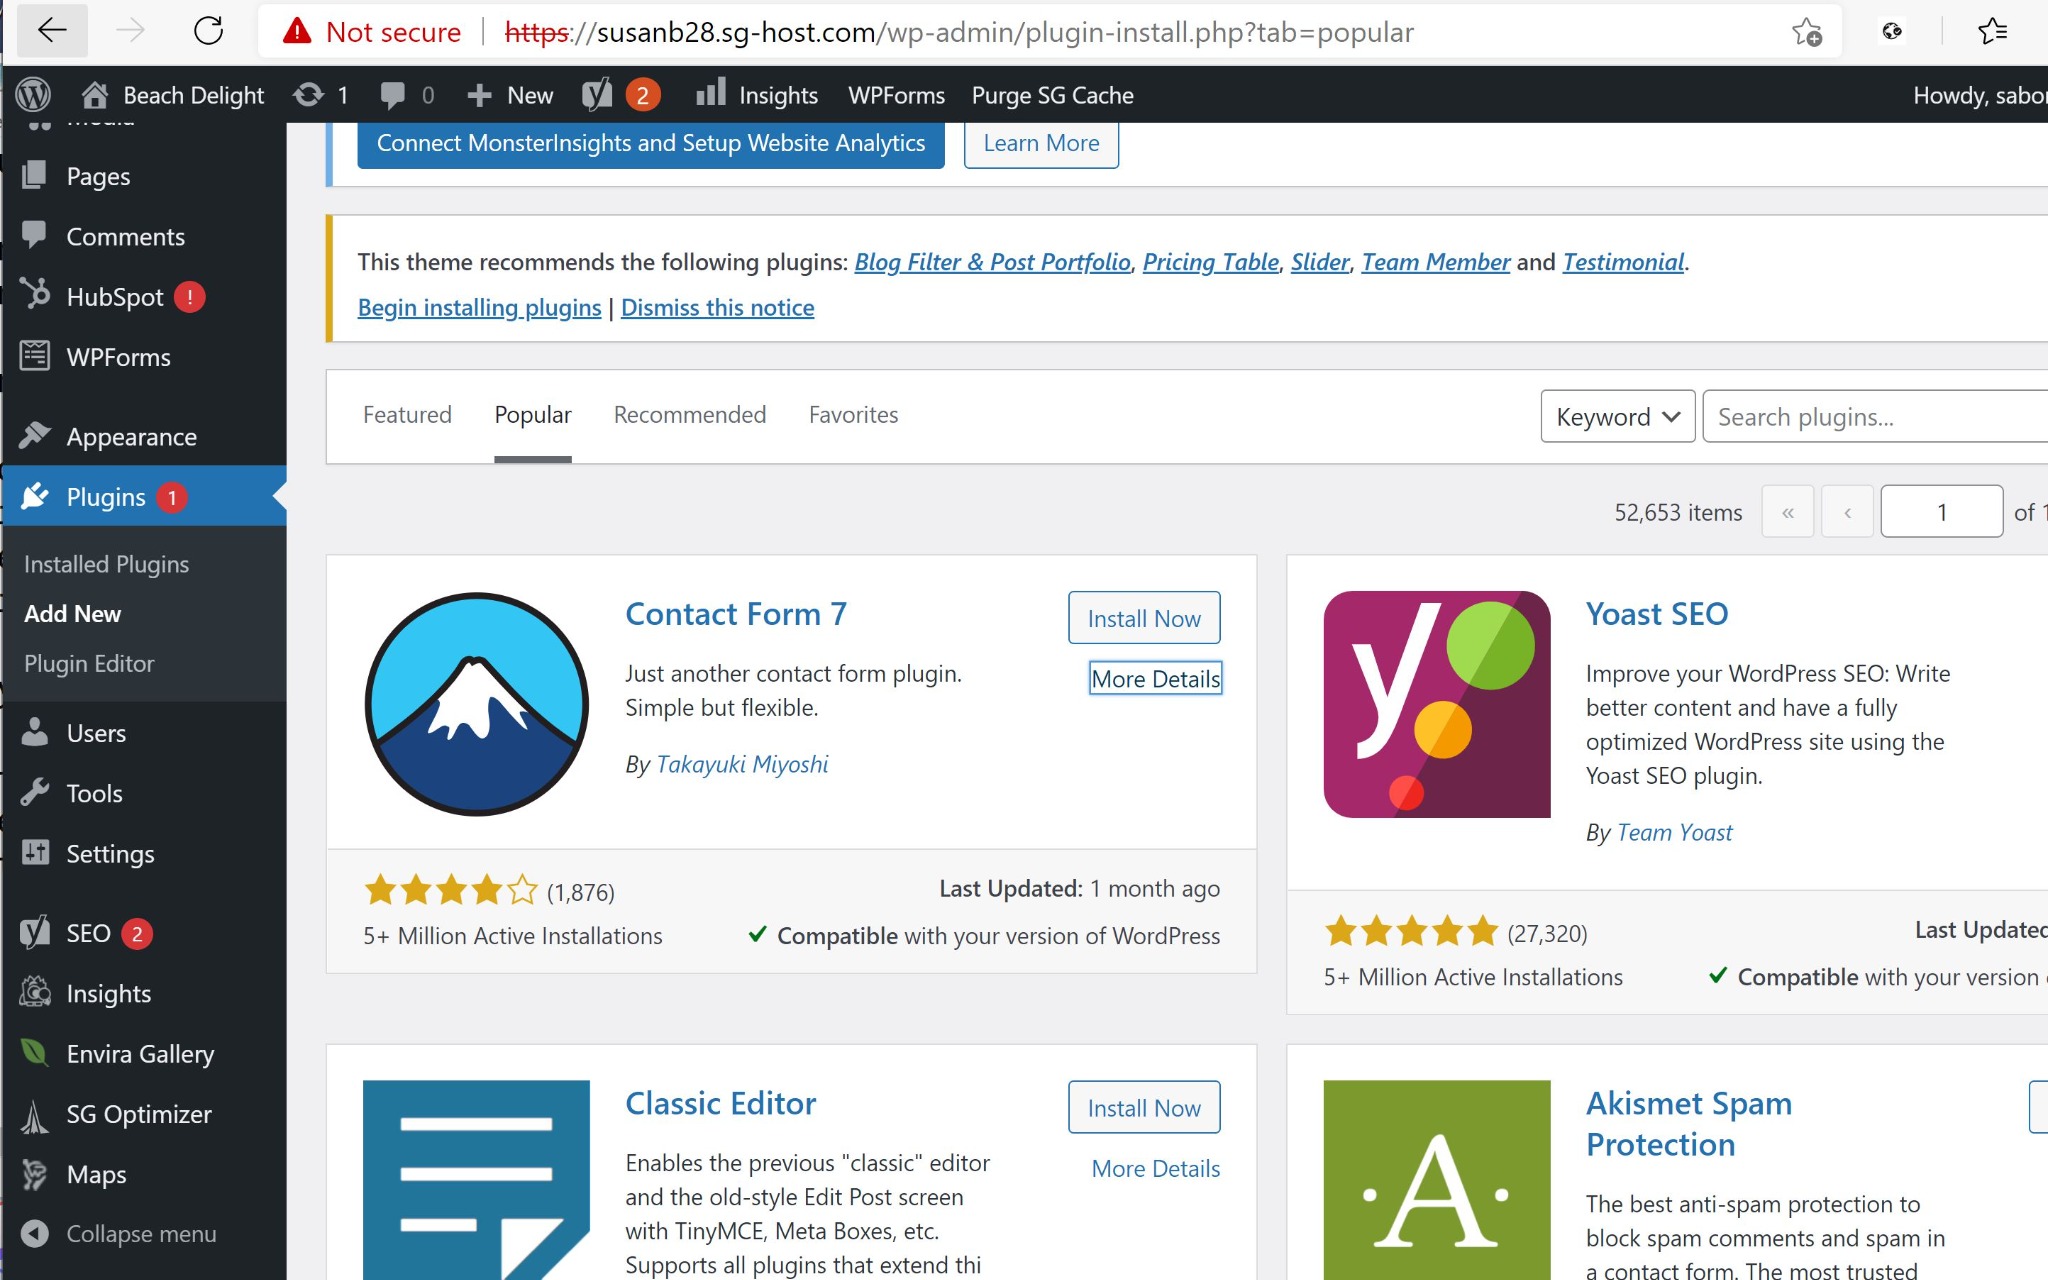
Contact Form 7 plug-in allows you to do a lot without spending anything. Just choose the Add New button on the plug-ins menu and then search for Contact Form 7 and choose Install Now. Then click Activate to activate the newly installed plug-in.
If you mistakenly add plug-ins, you can go to the plug-ins page, choose to deactivate that plug-in and then choose to delete the plug-in.
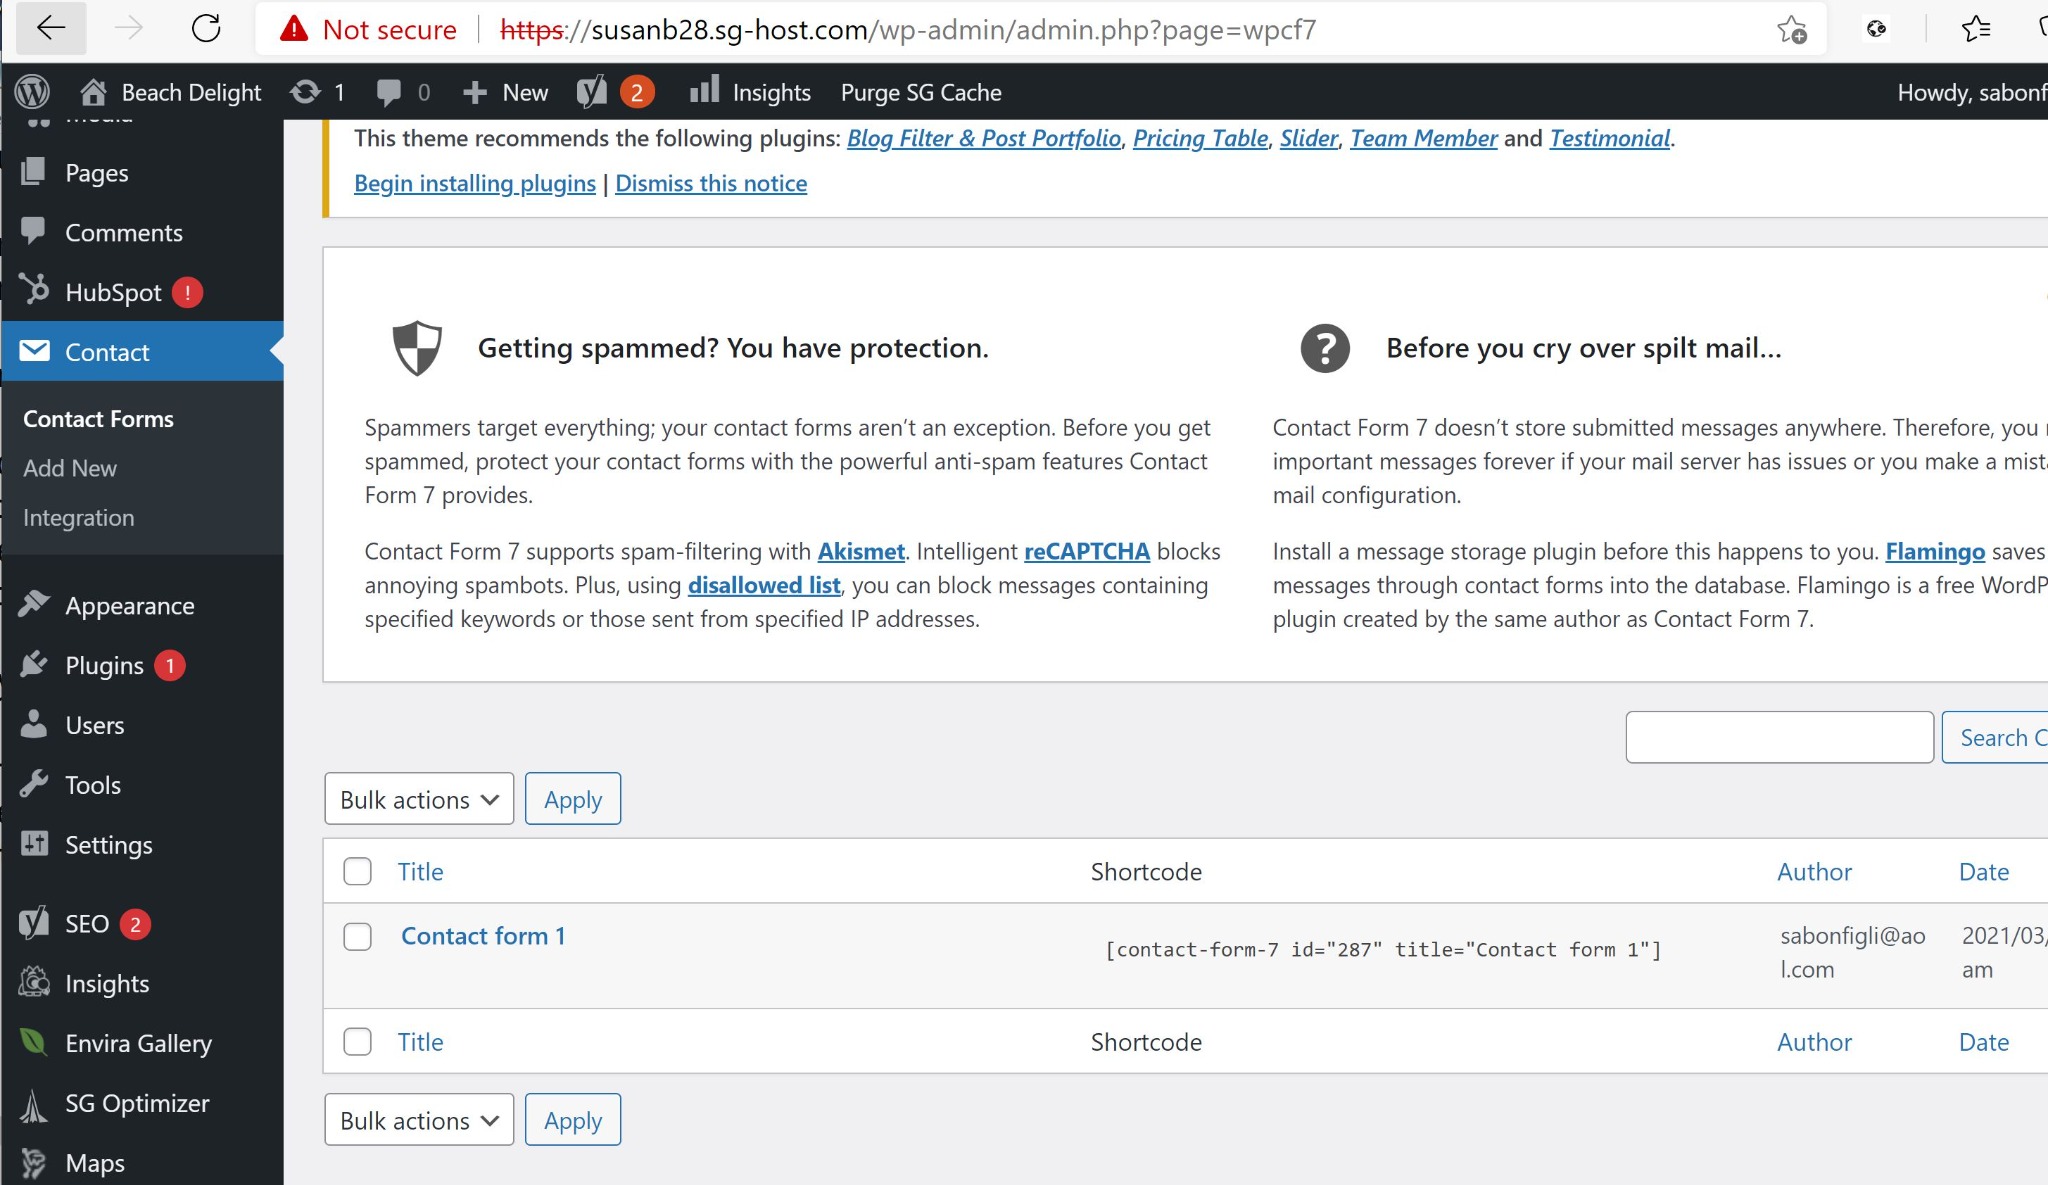
With Contact Form 7 installed and activated, you'll now see it listed on the left menu of your WordPress Editor. Click on that item and the area to edit on the right of the menu now displays a default contact form called "Contact form 1". You'll also see the generated shortcode associated with this form. If you want to add this form on to your Web page, you would copy this explicit shortcode onto the page for it to display there.
When you create the form you want to use, you may give it a name that's meaningful to you. For example, "Inquiry". When you save the form, the plug-in will automatically generate a shortcode value for this form. It's this shortcode you'll copy to any pages you want to use it.
Again, if you don't want to spend so much time on this set up, plan on doing it in the future. For now, you can integrate the Houfy embed codes to direct users to reserve there. You can also write your contact email and phone number directly on your Web site and instruct people to contact you that way.
Other Plugins and Ideas to Explore
If you have a social presence for your properties, you may want to integrate plugins that easily share your social links.
You may want to embed a Google Map showing your property.
Look at other vacation rental Web sites to get ideas of what things you may want to include on your site.
Your Website Minimal Needs
The minimum you should do is explore all of the Customization options for your chosen theme and ensuring you make the necessary edits. You want your words and your photos and not the ones that came with the free Theme you're using.
You also want to edit the Home page defined for your Web site. Again, you want your words and your photos. Describe your property and who it's suitable for. Include pictures. Perhaps install a Gallery plug-in to allow your photos to cycle through on the page where they are displayed.
Onto the next Houfy Story in this Guidebook
Now that you have the bulk of the work done, it's time to add the Houfy embedded tools. This is an easy way to share your calendar, pricing, photos and reviews directly on your Web site and then direct users to book on Houfy. See the next story, 4. Integrate Houfy Embedded Tools.
My SiteGround Referral Link
If you'd like to use SiteGround as your hosting platform, I would appreciate you using my referral link when you set up:


